ReactJS로 영화 웹서비스 만들기 BY노마드코더 PART3
2020-12-27 일요일
수업 영상을 보고 영상이 진행되는 순서에 맞춰 바로바로 작성하다 보니 장황하고 말 이상하게 쓸 수도 그리고 뇌피셜로 적는 내용이 있을 수 있고 빠짐없이 적고자 하지만 놓친 부분이 있으니 수업내용이 궁금하면 직접 보는 걸 추천드립니다.
결정적으로 웹 HTML만 조금 배운상태에서 진행한거여서 완벽하지 않습니다
아마 이글을 보는 사람이 없을 거 같기는 한데 노파심에
#3. STATE
#3. 0 Class Components and State
1. 기존 존재하는 component들을 지우고 app component를 function component에서 class component로 변경한다.
2. 이후 app component도 지우고 결과적으로 class app component를 만드는데 React.Component를 상속받는다.
ex)
핸드폰 게임을 개발한다면 samsung을 iphone을 프로그래밍하지 않고 cell phone을 프로그래밍한다.
cell phoene 은 여러 가지 특성이 있다. 예를 들면 screen, charger 등등
iphone과 samsung은 이러한 것을 공유한다.
그래서 camera, screnn, charger를 cell phone class에 넣은 다음에서 확장한 samsung class를 가지게 된다.
위에서의 React.Component를 상속받고 만든 class app component는 기본적으로 react class component에서 가져오고 있다. 그리거 거기서 확장하고 있다. 결과적으로 App component는 react component이다.
3. function component와 class component의 차이
- function component는 return을 통해 반환한다. 하지만 class component는 반환을 하지 않는다. function이 아니기에
- 그리고 class react component에는 render method를 가지고 있다.
현재 react component를 상속한 class App component도 동일하게 react component를 가지고 있다.
render 메서드 안에서 리턴 html 문을 작성하면 출력이 되는 것을 확인할 수 있다.
import React from "react";
import PropTypes from"prop-types";


class App extends React.Component {
    render() {
        return <h1>im a class component</h1>;
    }
}

export default App;

결과적으로
Function component는 function이고 뭔가를 return 한다 그리고 screen에 표시가 되고
class component는 class이다 하지만 react component로부터 확장되거 screen에 표시가 된다.
그리고 화면에 표시하기 위해선 render 메서드 안에 넣어야 하고 react는 자동적으로 모든 class component의 render method를 실행하고자 한다.
react는 자동적으로 나의 class component의 render method를 실행한다 자동으로
그 자바 보면 컴파일하려면 main 메서드부터 읽어오는 그러는 느낌인가
4. state는 object이고 component의 data를 넣을 공간이 있고 이 data는 변한다.
그리고 state를 render 안에 넣으려면 class 이기에 this.로 표현해주어야 한다.
import React from "react";
import PropTypes from"prop-types";


class App extends React.Component {
    state = {
        count: 0
    };
    render() {
        return <h1>im a class component {this.state.count}</h1>;
    }
}

export default App;
결과적으로 우리는 state에 바꾸고 싶은 data를 넣는 것
일단 소스코드부터 보고 작성하겠다.
import React from "react";
import PropTypes from"prop-types";
class App extends React.Component {
state = {
count: 0
};
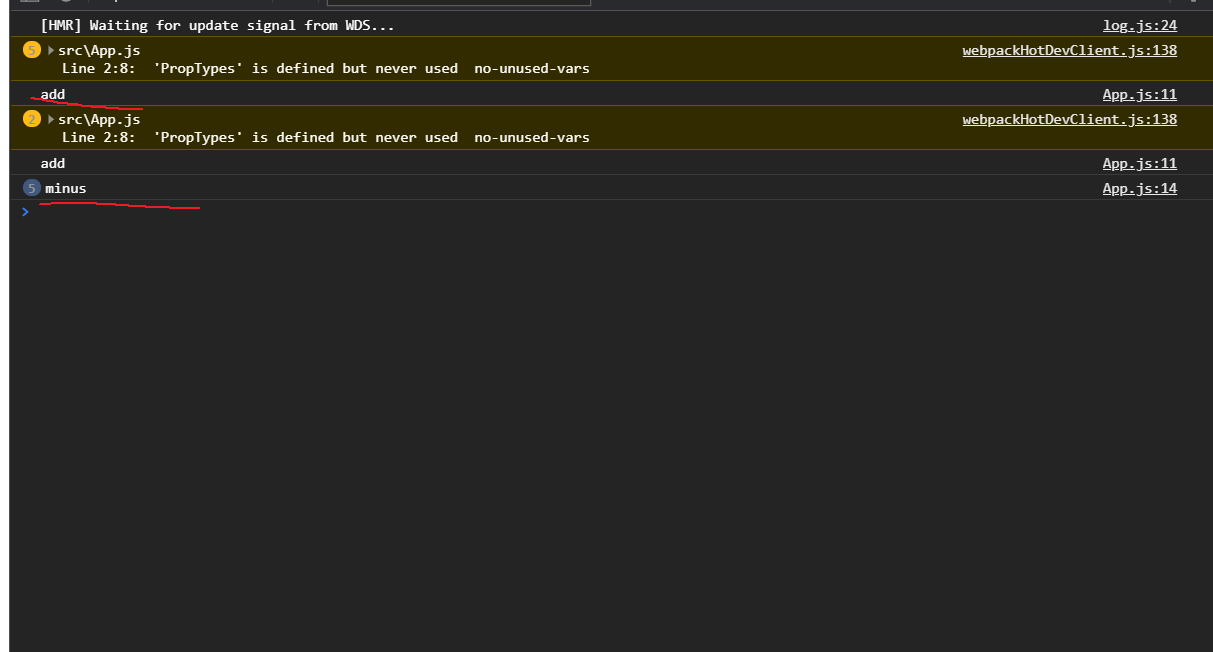
add = () => {
console.log("add");
};
minus = ()=>{
console.log("minus");
};
render() {
return(
<div>
<h1>this number is:{this.state.count}</h1>
<button onClick={this.add}>Add</button>
<button onClick={this.minus}>Minus</button>
</div>
)
}
}
export default App;
일단 보면 add =() =>{} 안에 적혀 이 쓴 게 두 개가 보인다. 이는 javascript 언어라고 한다.
뭘 의미하는지는 정확히 모르겠지만 console.log("add"); 를 나타내게 해주는 역할을 하는 것 같다.
그리고 아래 render 쪽을 보면 두 개의 버튼이 만들어진 것을 확인할 수 있는데 이는 react에서만 작용한다고 한다. 아무튼
이렇게 버튼 두 개에 onClick을 적어 버튼을 눌렀을 때 this.로 위에 만들어진 add와 minus를 실행하게 하는 것 같은데
여기서 주의할게 thsi.add()로 작성하게 된다면 버튼을 누르기도 전에 생성이 된다고 한다. 클릭될 때 동작하게 하려면 ()를 빼주어야 한다고 한다.
아무튼 이렇게 작성 후 버튼을 여러 번 누르고 콘 살창을 확인해보면 숫자가 올라가 있는 것을 확인할 수 있다.
#3. 1 All you need to know about State
State값을 변경하면 웹에 바뀌지 않는 것을 확인할 수 있다. 이는 왜 그러냐면 state값을 변경하면 다시 render를 실행시켜주어야 하는데 실행이 안되어서 업데이트가 되지 않는다. 그래서 우리는 setState를 사용해야 한다. setState를 사용해 값을 변경하면 react는 바로 state를 refresh 하고 바로 render를 불러온다고 한다.
import React from "react";
import PropTypes from"prop-types";


class App extends React.Component {
    state = {
        count: 0
    };
    add = () => {
        this.state=2;
    };
    minus = ()=>{
        this.setState({count:-1});
    };

    render() {
       return(
           <div>
               <h1>this number is:{this.state.count}</h1>
               <button onClick={this.add}>Add</button>
               <button onClick={this.minus}>Minus</button>
           </div>
       )
    }
}

export default App;
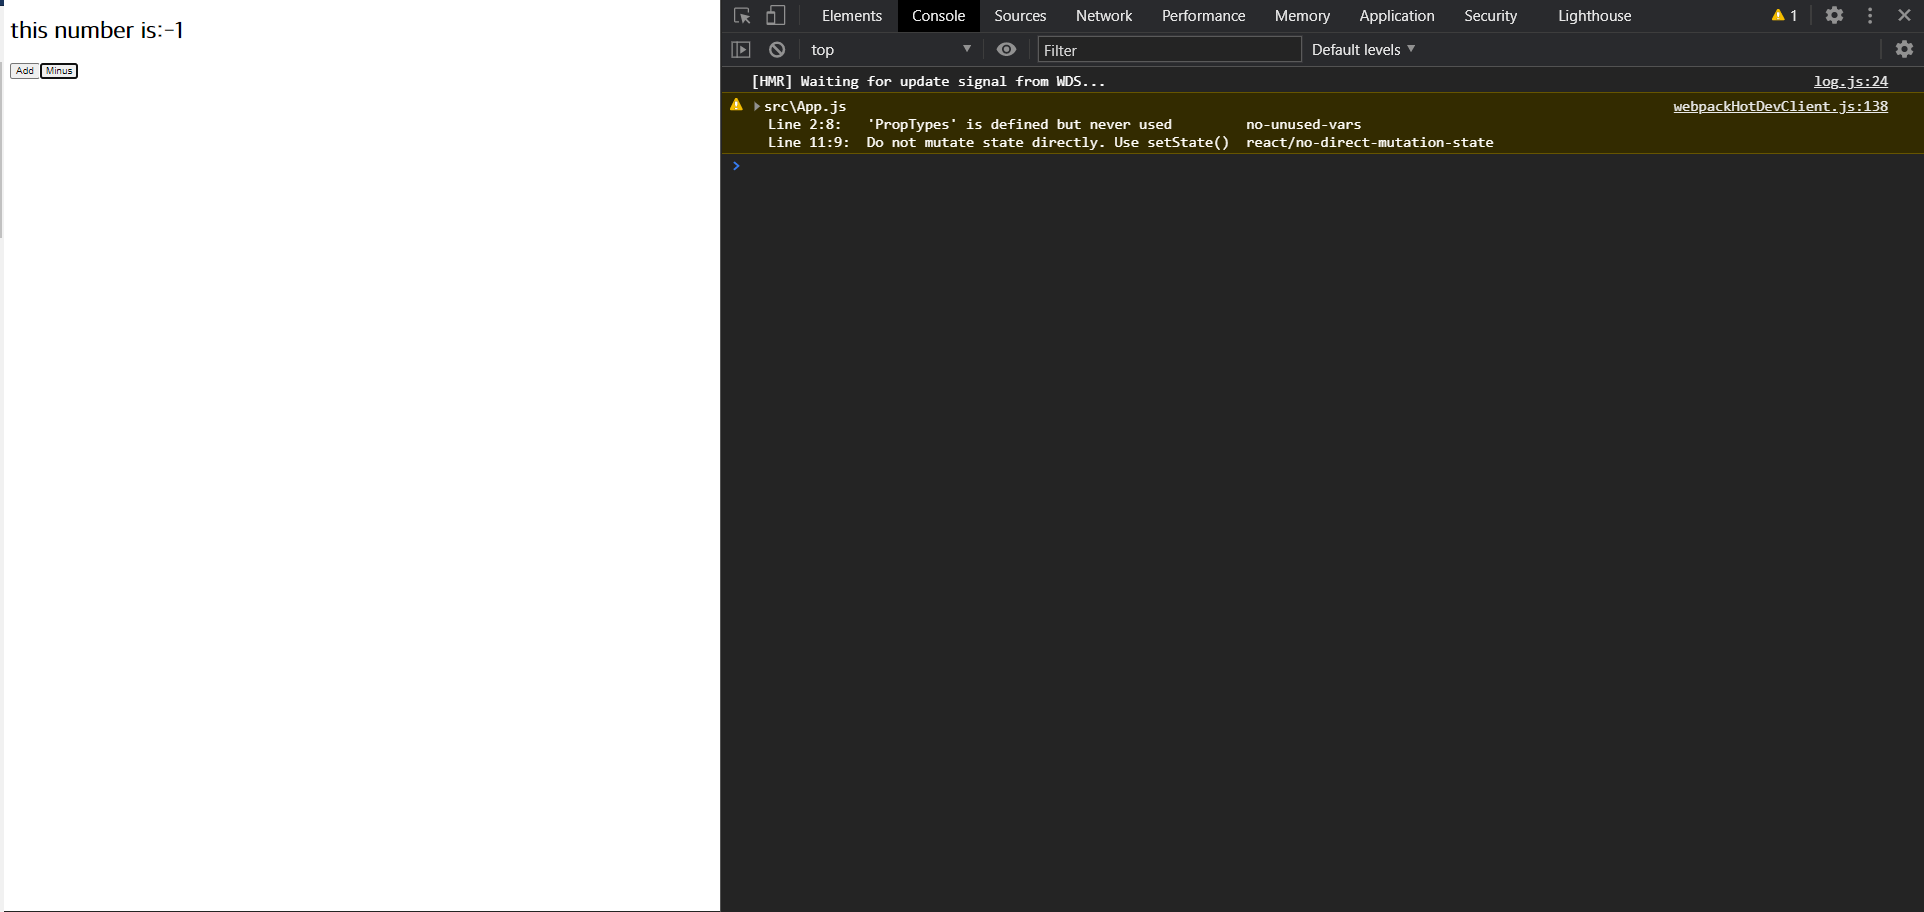
위와 같이 add에서는 this.state=로 설정하고 minus는 setState를 이용해서 설정하고 버튼을 눌렀을 때
add버튼 같은 경우 아무 반응이 없고 minus버튼을 누르면 count가 -1로 변경돼서 바로 바뀌는 것을 볼 수 있다.
이는 html 코드로 본다면 react에서 필요한 부분을 빠르게 추가해서 표시해주는 걸 확인할 수 있는데 이때의 속도는 엄청나게 빠르다고 한다.
setState를 사용하지 않으면 새 state와 함께 render function이 호출되지 않을 것이다.
import React from "react";
import PropTypes from"prop-types";


class App extends React.Component {
    state = {
        count: 0
    };
    add = () => {
        this.setState(current=> {count: this.state.count +1});
    };
    minus = ()=>{
        this.setState({count: this.state.count -1});
    };

    render() {
       return(
           <div>
               <h1>this number is:{this.state.count}</h1>
               <button onClick={this.add}>Add</button>
               <button onClick={this.minus}>Minus</button>
           </div>
       )
    }
}

export default App;
add 버튼을 누를 때마다 +1 이되도록 minus버튼을 누를때마다 -1이 되도록 코드를 쓴다.
이렇게 코드를 쓰는 것은 좋은 방법은 아니라고 한다. state에 너무 의존적이라고 함.
current를 이용해서 작성하면 훨씬 나은 방법이라고 한다.
#3. 2 Component Life Cycle
react component에서 유일하게 사용되는 function은 render function이다.
component와 react component는 render 이외의 많은 것을 더 가지고 있다.
life cycle method를 가지는데 기본적으로 react가 component를 생성하는 그리고 없애는 방법이다.
Mounting:
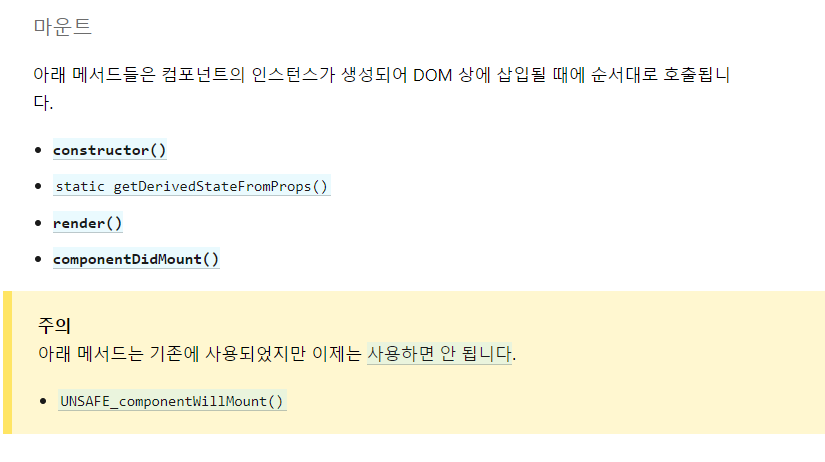
먼저 호출되는 function은 counstructor()인데 이건 react에서 오지 않고 javascript에서 왔고
Javascript에서 class를 만들 때 호출되는 것이다.
그리고 웹사이트에서 component에서 render 하기 이전에 먼저 constructor()가 먼저 실행된다고 한다.
그리고 render가 끝나면 componentDidmount가 실행한다고 한다.
import React from "react";
import PropTypes from"prop-types";
class App extends React.Component {
state = {
count: 0
};
add = () => {
this.setState({count: this.state.count +1});
};
minus = ()=>{
this.setState({count: this.state.count -1});
};
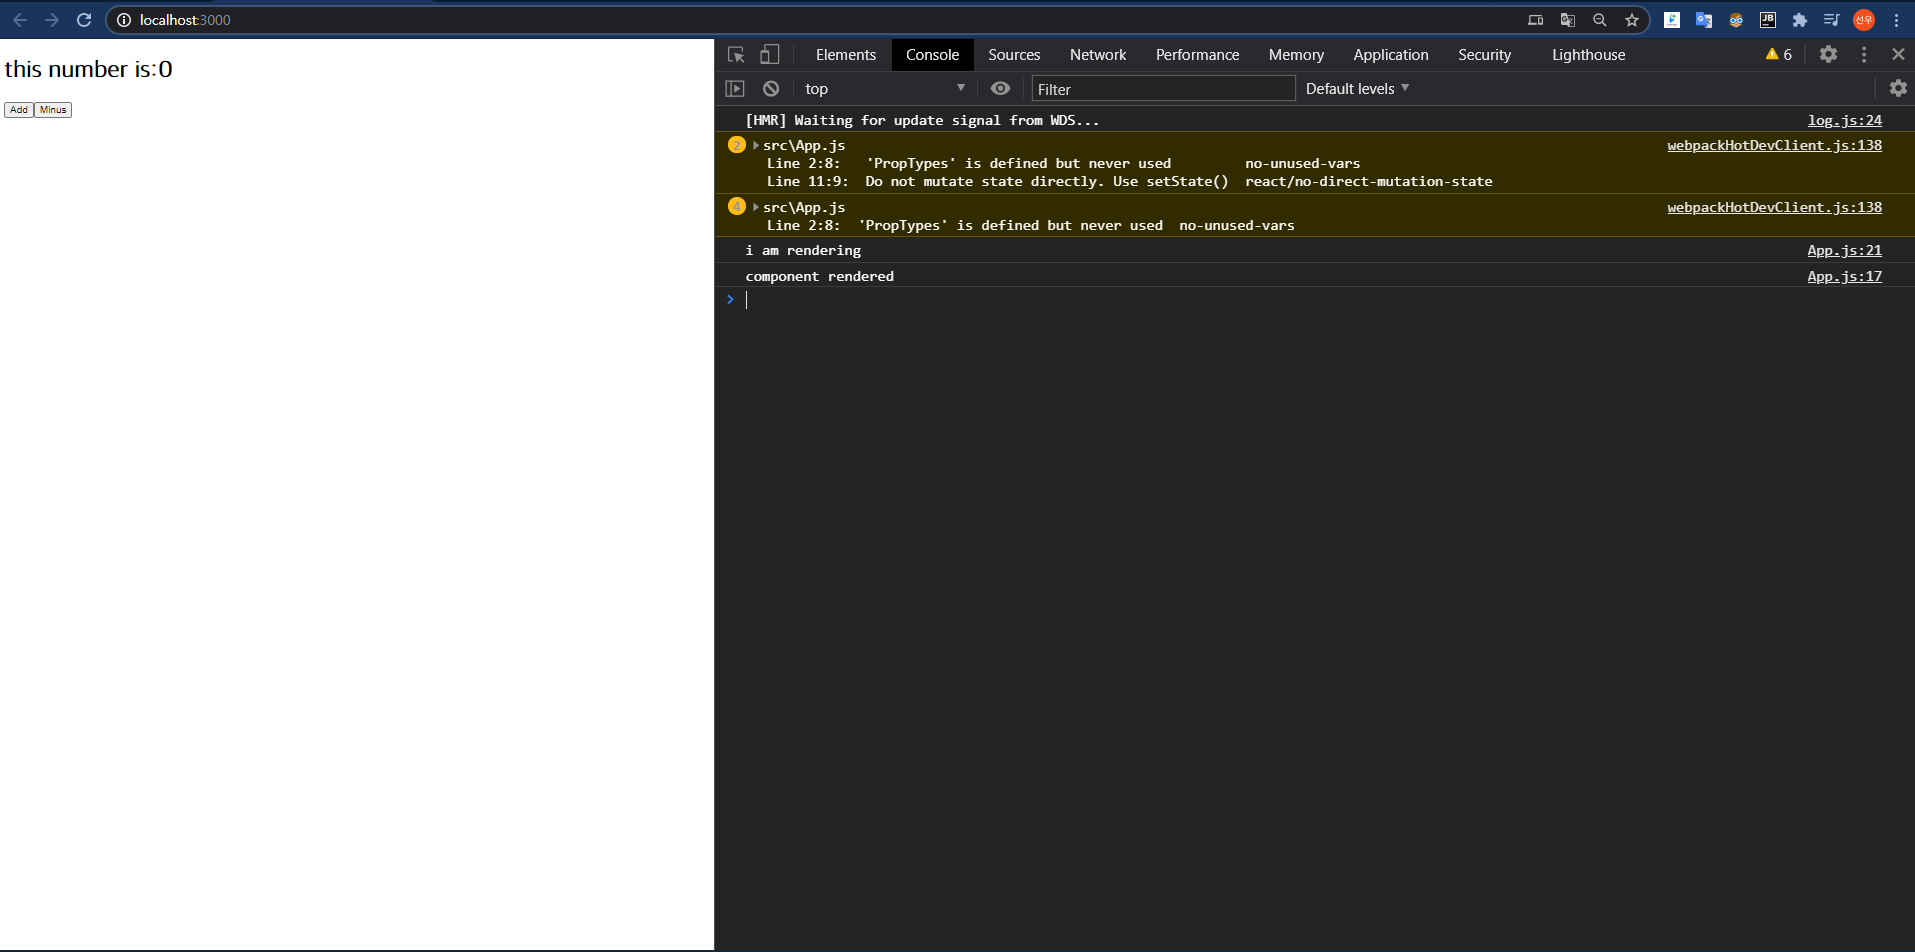
componentDidMount() {
console.log("component rendered")
}
render() {
console.log("i am rendering");
return(
<div>
<h1>this number is:{this.state.count}</h1>
<button onClick={this.add}>Add</button>
<button onClick={this.minus}>Minus</button>
</div>
)
}
}
export default App;
위에서 render와 componentDidMount에 console.log를 만들어 확인해보면 무엇이 먼저 실행되는지 확인 가능하다.
Updating:
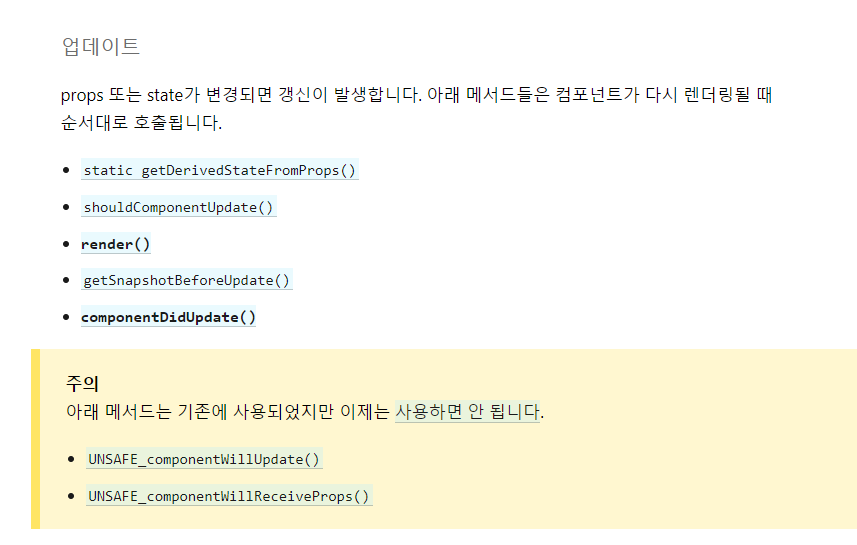
업데이트의 원인은 사용자가 된다 아까 위에서 만들었던 add와 minus 버튼을 눌러 출력 값이 변경되는 것을 업데이팅이라고 할 수 있다.
component가 업데이트될 때 호출되는 많은 function이 있다. 그중 하나는 getDerivedStateFromProps인데 이건 여기서 이야기 안 한다고 한다.
여기서 봐야 할 것은
componentDidUpdate이다.
코드를 작성 후 웹에 가서 add버튼을 누르고 console창을 보면 componentDidUpdate가 실행되었다는 것을 확인할 수 있다.
import React from "react";
import PropTypes from"prop-types";


class App extends React.Component {
    state = {
        count: 0
    };
    add = () => {
        this.setState({count: this.state.count +1});
    };
    minus = ()=>{
        this.setState({count: this.state.count -1});
    };
    componentDidMount() {
        console.log("component rendered")
    }
    componentDidUpdate(prevProps, prevState, snapshot) {
        console.log("i just updated");
    }

    render() {
        console.log("i am rendering");
       return(
           <div>
               <h1>this number is:{this.state.count}</h1>
               <button onClick={this.add}>Add</button>
               <button onClick={this.minus}>Minus</button>
           </div>
       )
    }
}

export default App;
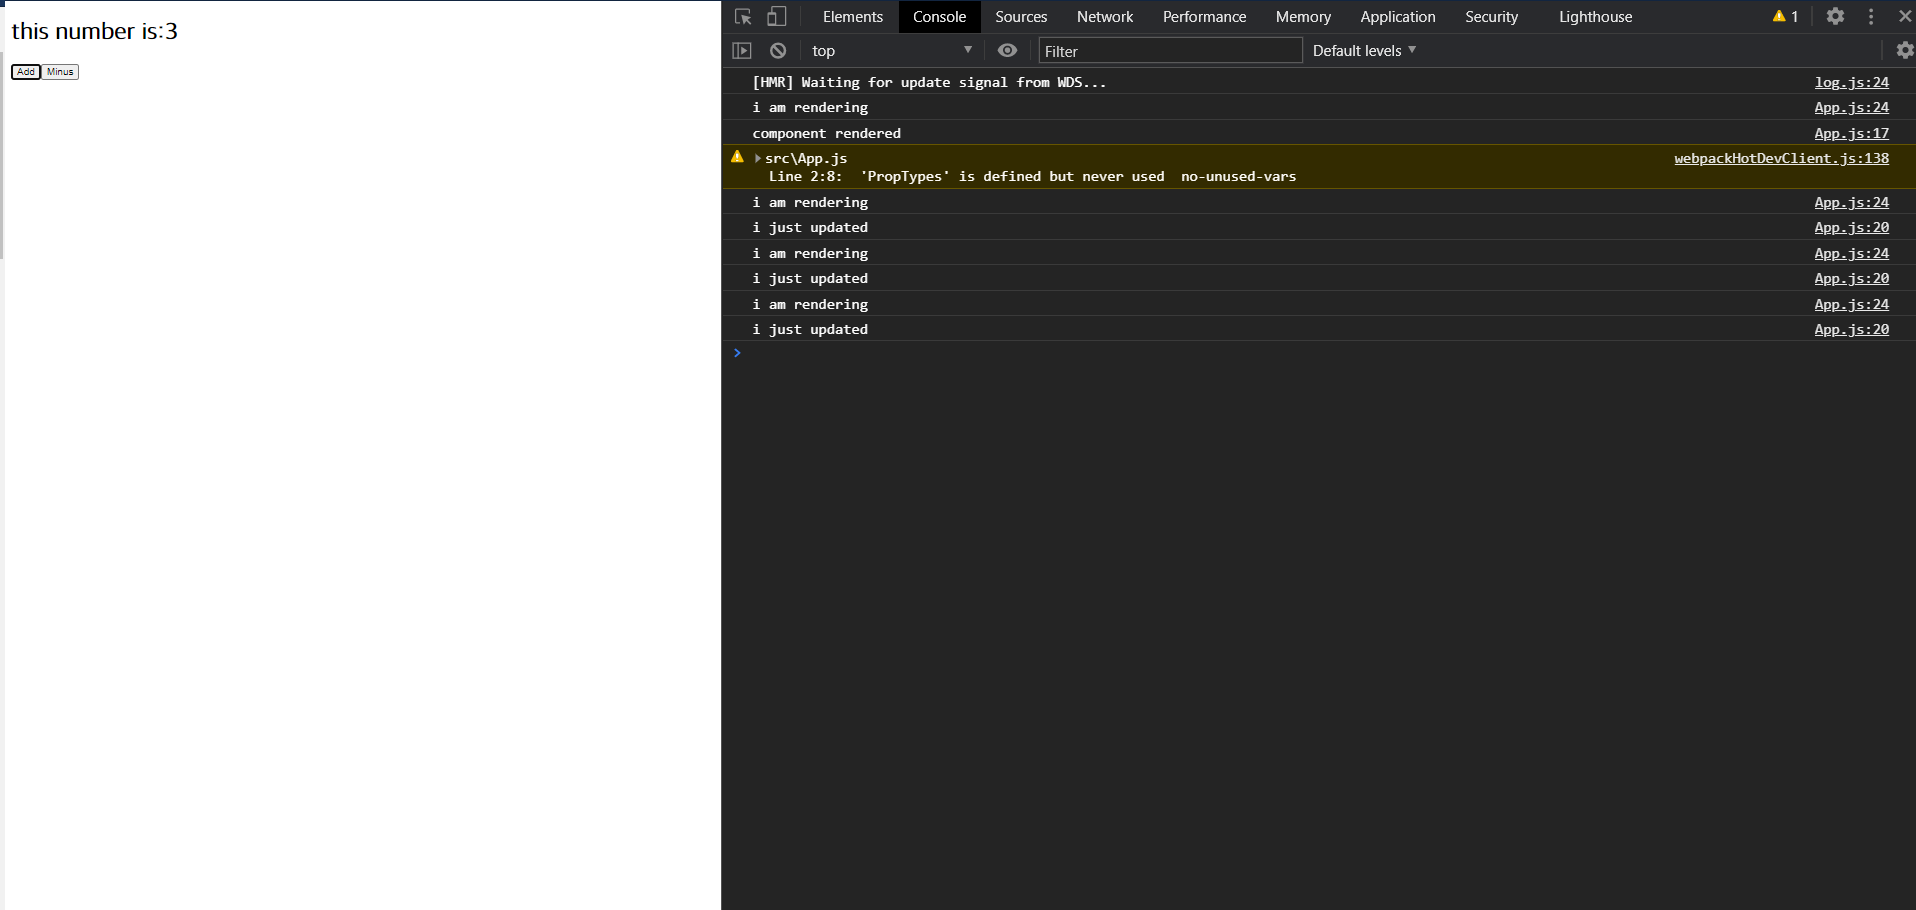
setState를 호출하면 component를 호출하고 먼저 render를 호출한 다음 업데이트가 완료되었다고 말하면 componentDidUpdate가 실행될 것이다.
Unmounting :
component가 죽을 때이고 죽을때 실행한다 실행하는지 확인할 방법은 없지만 믿으라고 한다. 실행된다고 ㅋㅋ
#3. 3 Planning the Movie Component
위에서의 component life cycle을 알아보았고 이제는 만드려고 한 movie component를 구성해본다.
import React from "react";

class App extends React.Componet {
    state={
        isLoading: true
    };
    componentDidMount(){
        setTimeout(() => {
            this.setState({isLoading: false});
        },6000)  // 자바스크립트의 delayfunction이라고 한다. render 다음 componentDidMount가 실행되는데 6초뒤 실행되게 설정
    }
    render(){
        const { isLoading } = this.state;
        return <div>{isLoading ? "Loading..." : "We are ready"}</div>
        // 자바스크립트의 삼항연산자라고 한다 true일시 Loadingd이 false일때 We are ready가 출력되게 만든다.
    }
}
6초 뒤에 웹에 We are ready가 생성되는 걸 확인할 수 있고
이론적으로 우리가 할 링은 componentDidMount에서 data를 fetch 하는 것이다.
그리고 API로부터 data fetching이 완료되면 "we are ready"대신에 movie를 Render 하고 map을 만들고 movie를 하는 것이다.